Starlink Cable Routing and Weatherproof Entry
Cable routing is the least glamorous part of a Starlink installation and the part most likely to cause an expensive problem later. A dish on a perfect mount, fed by a cable that was bent too tightly and passed through an unsealed hole, will give you an intermittent fault in year two and a damp wall cavity in year three.
There are three things a cable route has to get right. It has to keep the cable within its bend radius, because the conductor and shielding inside do not tolerate sharp bends — particularly after they have stiffened through an Alberta winter and cycled through freeze and thaw. It has to enter the building at a point that is sealed with an exterior-grade product and given a drip loop, so water runs away from the penetration rather than tracking along the cable into the wall. And it has to protect the cable from ultraviolet, abrasion and anything mechanical between the dish and the entry point.
The other constraint people do not expect: the Starlink cable between dish and router is a proprietary run with a length limit, and it is not something you can casually splice or extend. That shapes the whole design, which is why the router position gets decided before anything is mounted rather than after.
Our work
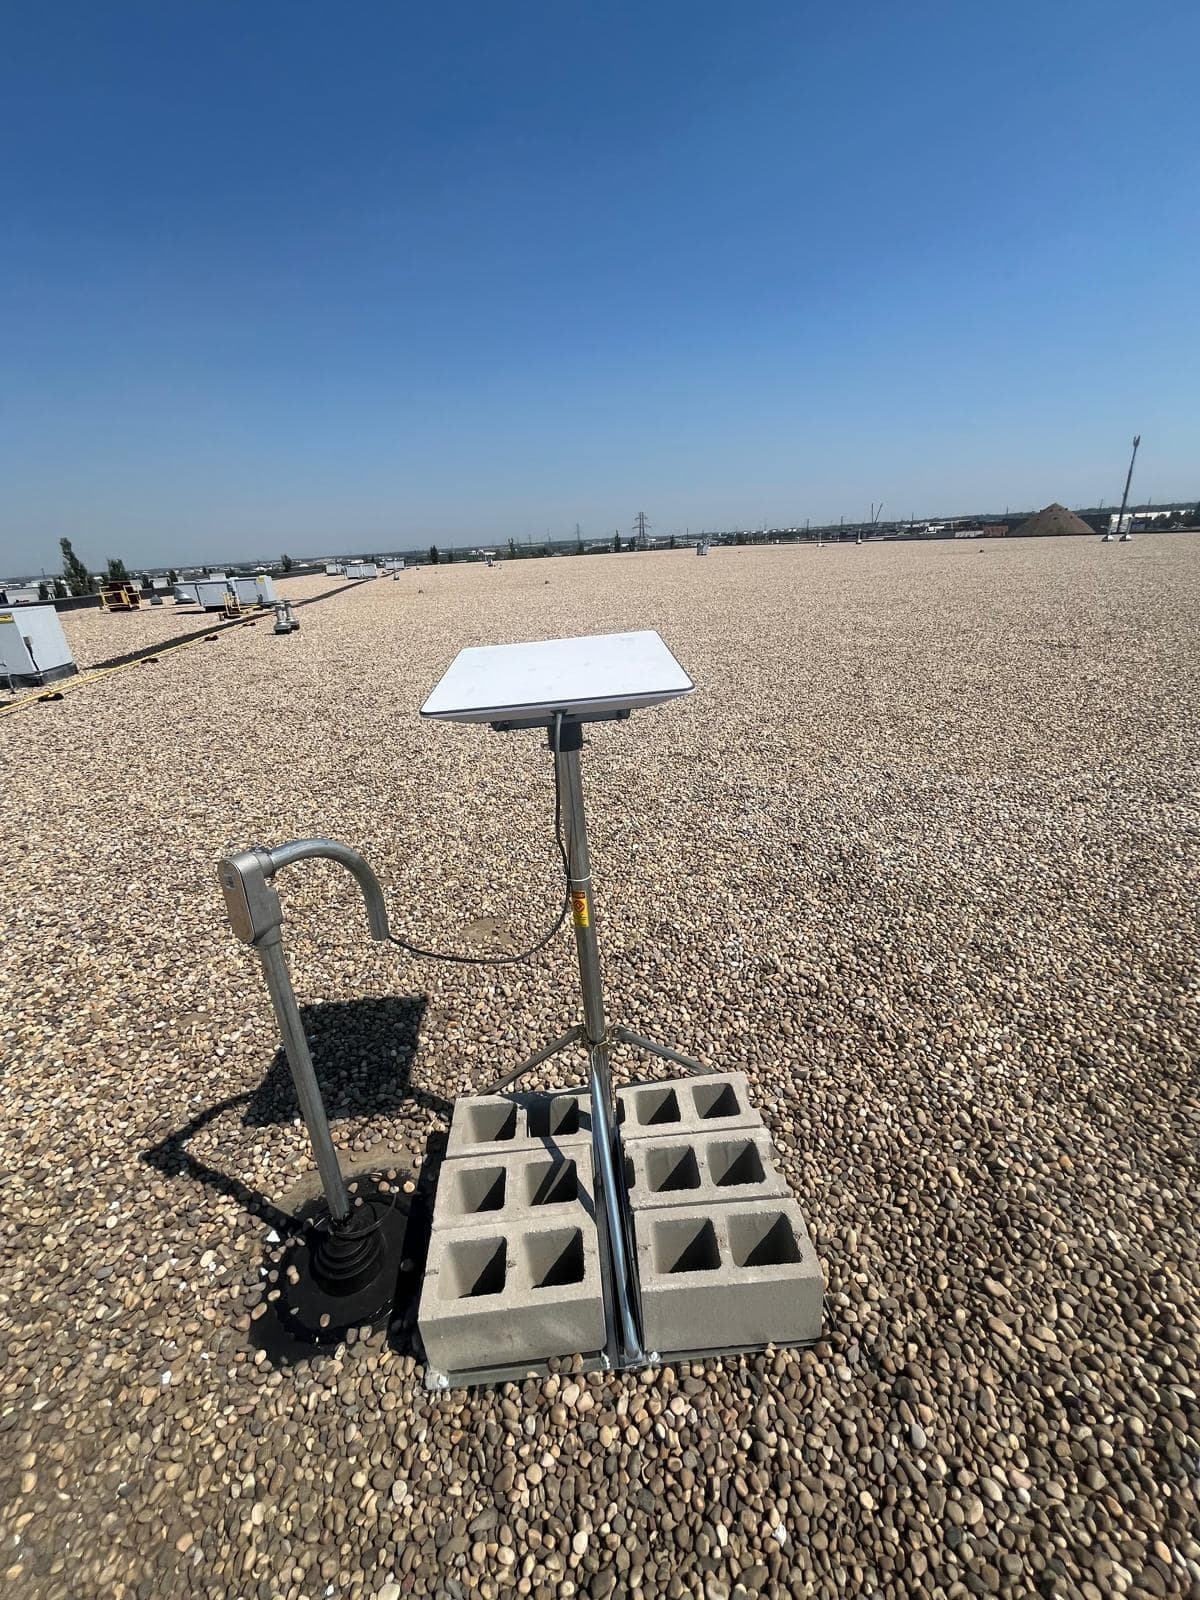
Photographs from our own installations, not stock images.
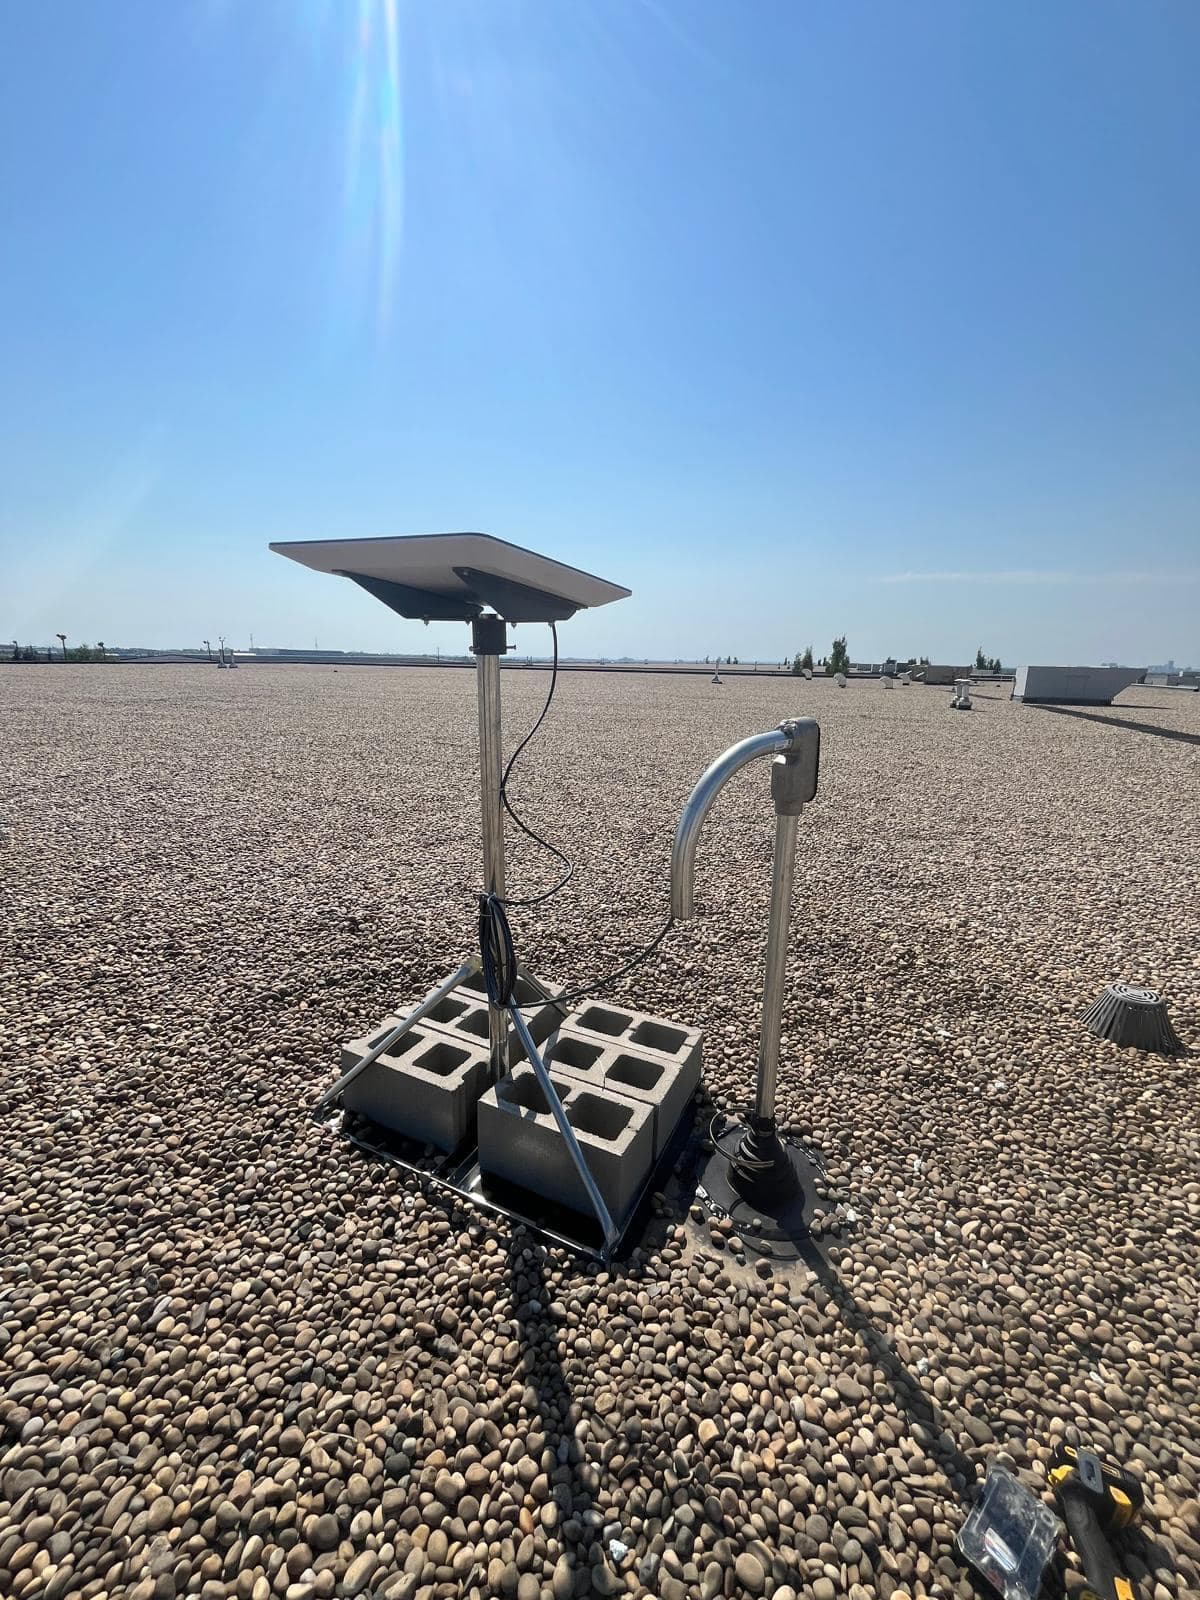
A weatherhead turns the conduit downward so water runs off rather than into the run. Ballast sized for the exposure this roof actually sees. 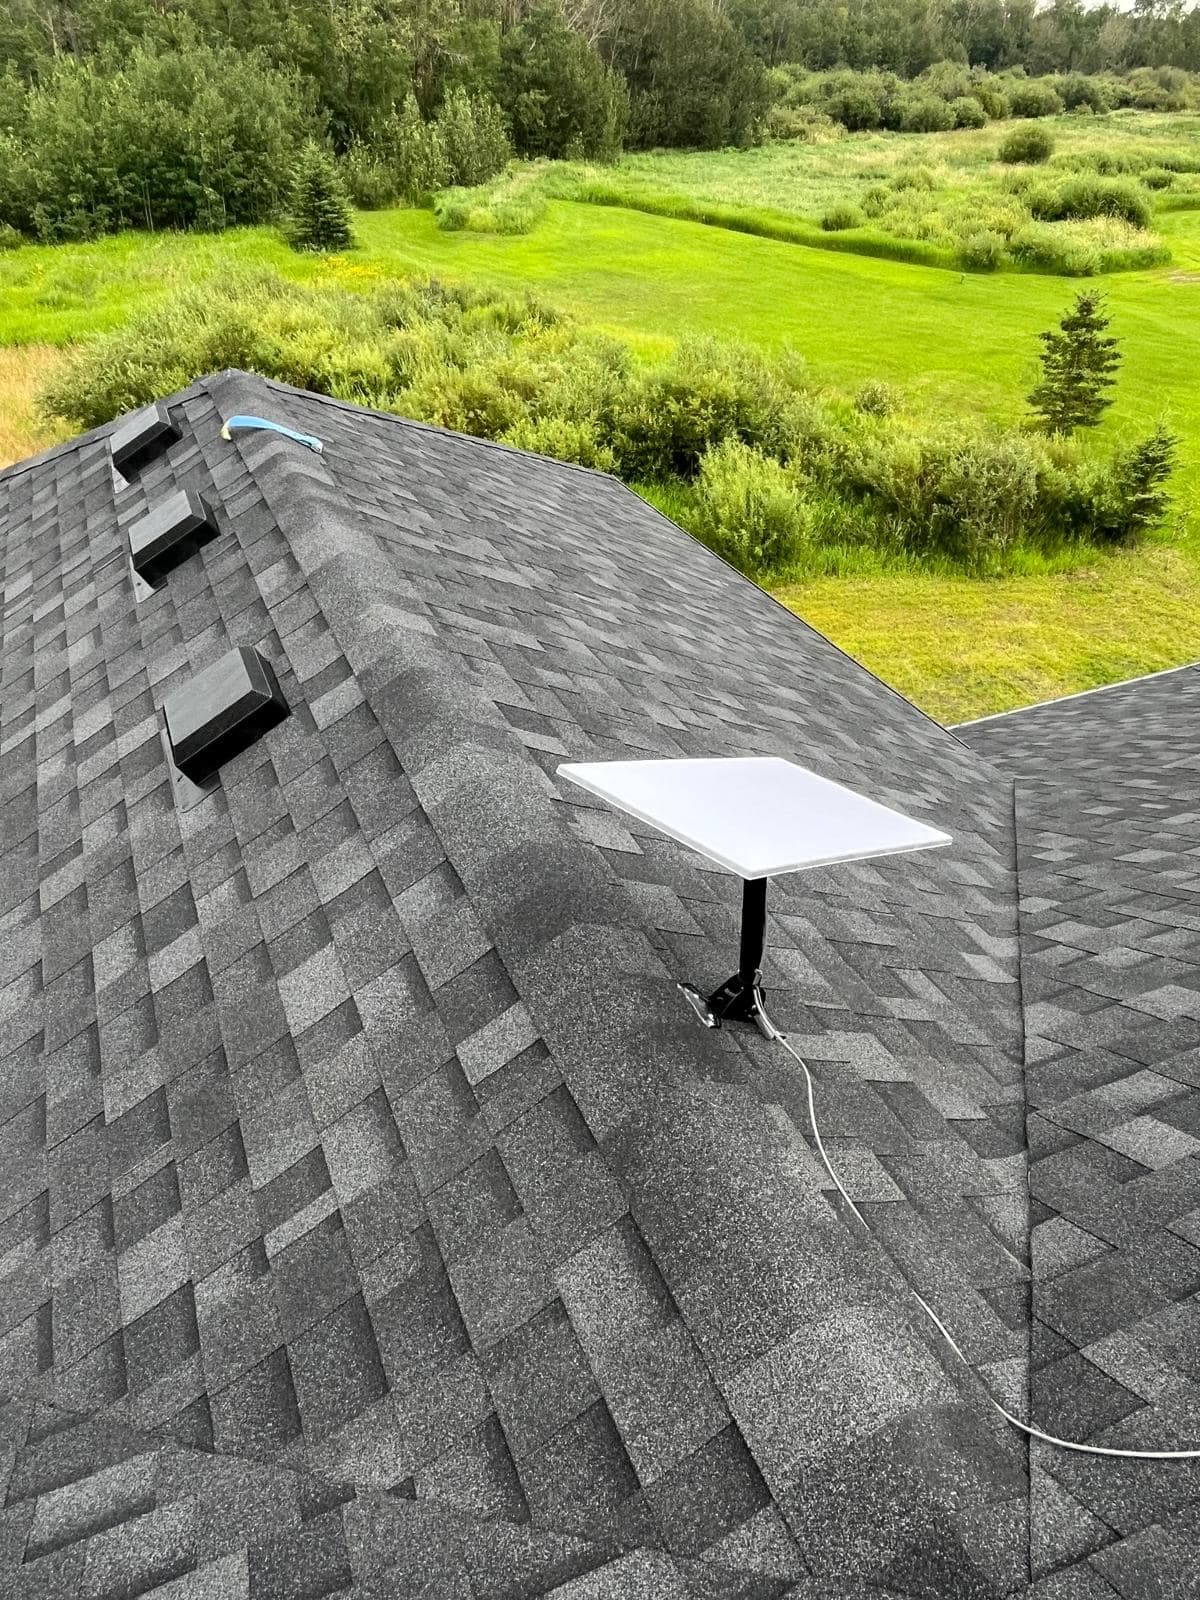
Residential installation on a rural property, with the cable run down the roof valley to a sealed entry point.
Common cable routes and when each one works
The right route depends on the building. These are the ones we use most, in rough order of how often they are the best answer.
- Soffit into attic, then down an interior wall
- Often the tidiest residential route. The cable enters through the soffit, crosses the attic, and drops down an interior cavity to the router location. Nothing is visible outside, and the penetration is sheltered. Watch for: insulation depth, and keeping the run clear of anything hot or sharp in the attic.
- Direct through an exterior wall
- The shortest route, drilled through the wall into the room where the router will sit. Fast and reliable when done properly — angled slightly downward to the outside, sealed with exterior-grade sealant, and given a drip loop below the entry. Watch for: knowing what is inside the wall before drilling.
- Down the exterior and into a basement rim joist
- Good where the router belongs in a basement utility area, particularly in unfinished basements where the rim joist is accessible. Keeps the cable out of finished living space entirely. Watch for: below-grade moisture, so the entry sits above grade and is sealed thoroughly.
- Existing service penetration
- Reusing a hole that is already there — an old satellite or cable TV entry, a redundant vent, or an existing conduit. The best option when you want no new penetration at all. Watch for: the old sealant is usually failed and needs replacing regardless.
- Exterior conduit
- The cable in rigid or flexible conduit down an exterior wall. Standard on commercial buildings and worth it anywhere the cable is exposed to damage, equipment or UV over a long run. Watch for: conduit needs to be sealed and drained, not turned into a water trap.
- Buried run between buildings
- For rural properties where the dish is on a pole or an outbuilding. The Starlink cable itself stays short — the router goes near the dish — and standard Ethernet is buried in conduit to the house. Watch for: burial depth, surge protection at both ends, and marking the route so it is not dug through later.
Weatherproofing the entry point
This is where installations most often fail in a way that damages the building rather than the equipment. Meltwater running down a cable and into a wall cavity does not announce itself — it shows up later as a stain, a smell, or mould found during a renovation.
Doing it correctly is not difficult and does not take long. It is simply skipped often enough that we see the consequences regularly.
- Drill angled slightly downward toward the outside so gravity works with you
- Leave a drip loop below the entry so water drips off before reaching the hole
- Seal with an exterior-grade, UV-stable sealant — not interior caulk, not tape
- Fit a proper grommet or bushing so the cable is not abraded by the hole edge
- Seal both the exterior and interior faces of the penetration
- Firestop the penetration where it passes through a fire-rated assembly
- Support the cable at intervals so its weight is never carried by the entry point
Cold weather and cable
Cable behaves differently at minus thirty than it does on the day it was installed. It stiffens, and a bend that was within tolerance when warm becomes a stress point once it has cycled through enough freeze and thaw. The resulting fault is intermittent and temperature-dependent — the connection degrades on cold days and recovers on mild ones — which makes it genuinely hard to diagnose if you are not expecting it.
So we route with generous radii rather than minimum ones, avoid tight corners entirely where a gentler path exists, and support the run so it cannot be pulled taut by ice or snow load. Sealant is chosen for cold flexibility, because a product that hardens and cracks at low temperature has effectively stopped sealing exactly when it matters most.
- Generous bend radii throughout, well beyond the stated minimum
- No tight corners at the entry point, which is where stress concentrates
- Cable supported so ice and snow load cannot pull it taut
- Cold-flexible exterior sealant that will not crack at low temperature
- UV-stable cable clips, since cheap plastic clips fail after a couple of seasons
How long can the cable run be?
The run between dish and router is proprietary and length-limited, and Starlink sells longer replacement cables for installations that need more reach than the supplied length gives. It is not a cable you should splice, extend with couplers, or improvise around — doing so causes exactly the intermittent faults that are hardest to trace.
Where a property needs more distance than the longest available cable provides, the correct design is different rather than longer: put the router close to the dish, in the building or in a weatherproof enclosure, and then distribute the network from there over standard Ethernet or a point-to-point wireless link. Ethernet gives you a hundred metres per hop and can be repeated; a wireless bridge covers distances that cable cannot reach economically. Both remove the constraint entirely, and both need deciding before the dish goes up.
Frequently Asked Questions
More on Starlink
The rest of the guide. Each page answers a different question.
Starlink Installation
The main guide — obstruction surveys, mounting, cable routing and network setup across Alberta.
Starlink installationEdmonton
Edmonton-specific Starlink installation: mature canopy obstruction surveys, snow-shed-aware mounting and sealed cable entry for our climate.
EdmontonCommercial & Business
Business-grade Starlink deployments integrated into a real network, with failover, documentation and support — not a residential dish on a commercial building.
Commercial & BusinessRural & Acreage
For acreages, farms and rural properties: wind-rated mounting, long cable runs, and coverage that reaches the shop and barn rather than stopping at the house.
Rural & AcreageMounting Options
Roof, pole, wall, ground and non-penetrating mounts compared honestly — including which ones we would not recommend and why.
Mounting OptionsStarlink Wi-Fi Setup
The dish gets you the connection; it does not get you coverage. Bypass mode, access point layouts and mesh done properly.
Starlink Wi-Fi SetupTroubleshooting & Repair
Diagnosing why a working Starlink stopped working — obstruction, cable, power or Wi-Fi. The three have completely different fixes.
Troubleshooting & RepairInstallation Cost
An honest breakdown of what drives installation price, what the Alberta market looks like, and where cheap quotes get expensive.
Installation Cost
Services That Go With This
The work customers most often need alongside a Starlink installation.
Starlink Installation
Obstruction surveys, secure mounting, weather-sealed cable entry and full network setup for Starlink dishes on homes, businesses and remote sites.
Starlink InstallationStructured Cabling
Cat6, Cat6A and fibre cabling installed to standard, terminated to labelled patch panels, tested and documented.
Structured Cabling
Request a Quote
Tell us about the site and what you need. We will come back to you with a straight answer about what the work involves and what it costs.