Professional Starlink Installation Across Alberta
Starlink hardware is designed to be self-installed, and for a dish sitting on a lawn with clear sky that works fine. The difficulty starts when the dish has to go on a roof, clear a stand of spruce, survive an Alberta winter, and feed a network that was never designed around it. That is the part we handle.
A Starlink dish needs an unobstructed view of a moving constellation, not just of the sky directly overhead. A tree line that looks harmless at ground level can clip satellites low on the northern horizon and produce the brief, repeated dropouts that make video calls unusable while a speed test still reads fine. We survey the obstruction cone before anything is mounted, so the position we choose is the one that actually holds up.
Every installation is mounted to structure rather than to shingles alone, sealed at the cable entry point, grounded where required, and finished with a router configuration that suits the building — not left with the cable draped through a window. We install for homes, acreages, farms, commercial buildings and temporary work sites throughout the Edmonton region and the rest of Alberta.
Our work
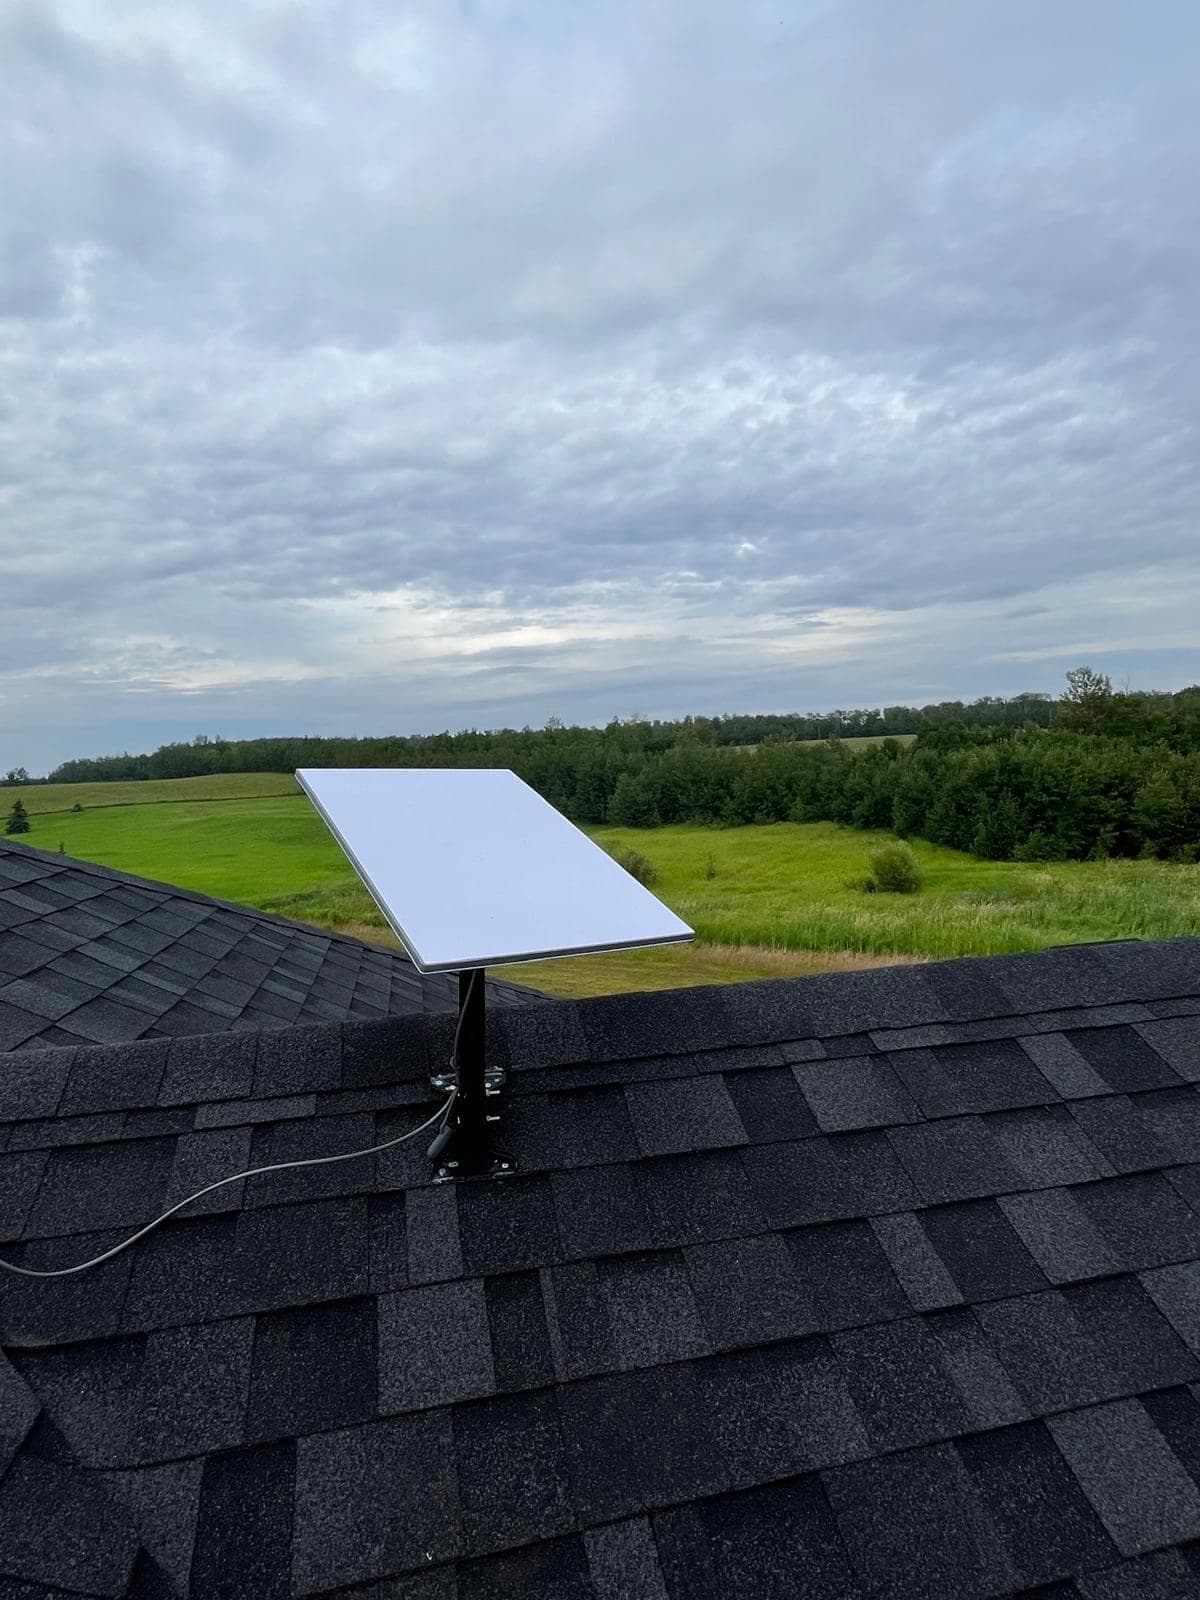
Photographs from our own installations, not stock images.
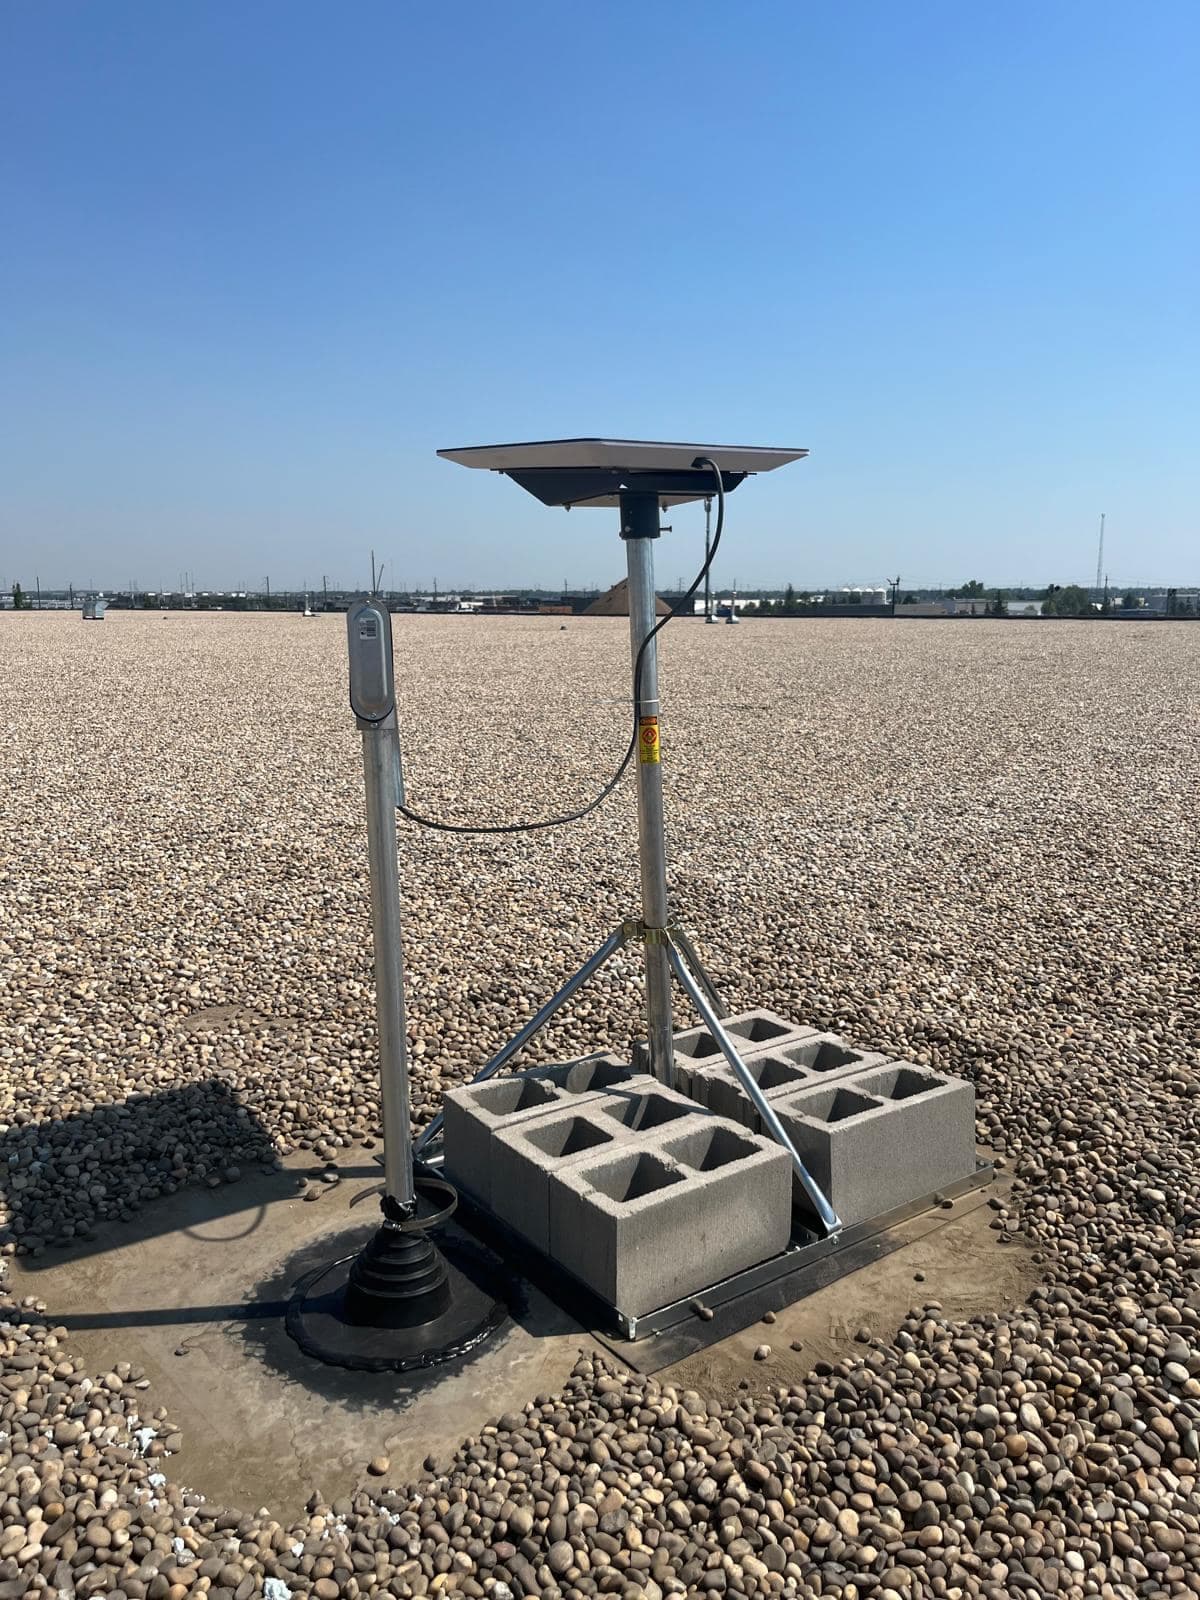
Non-penetrating ballast mount on a commercial flat roof. Nothing pierces the membrane, so the roof warranty is untouched. 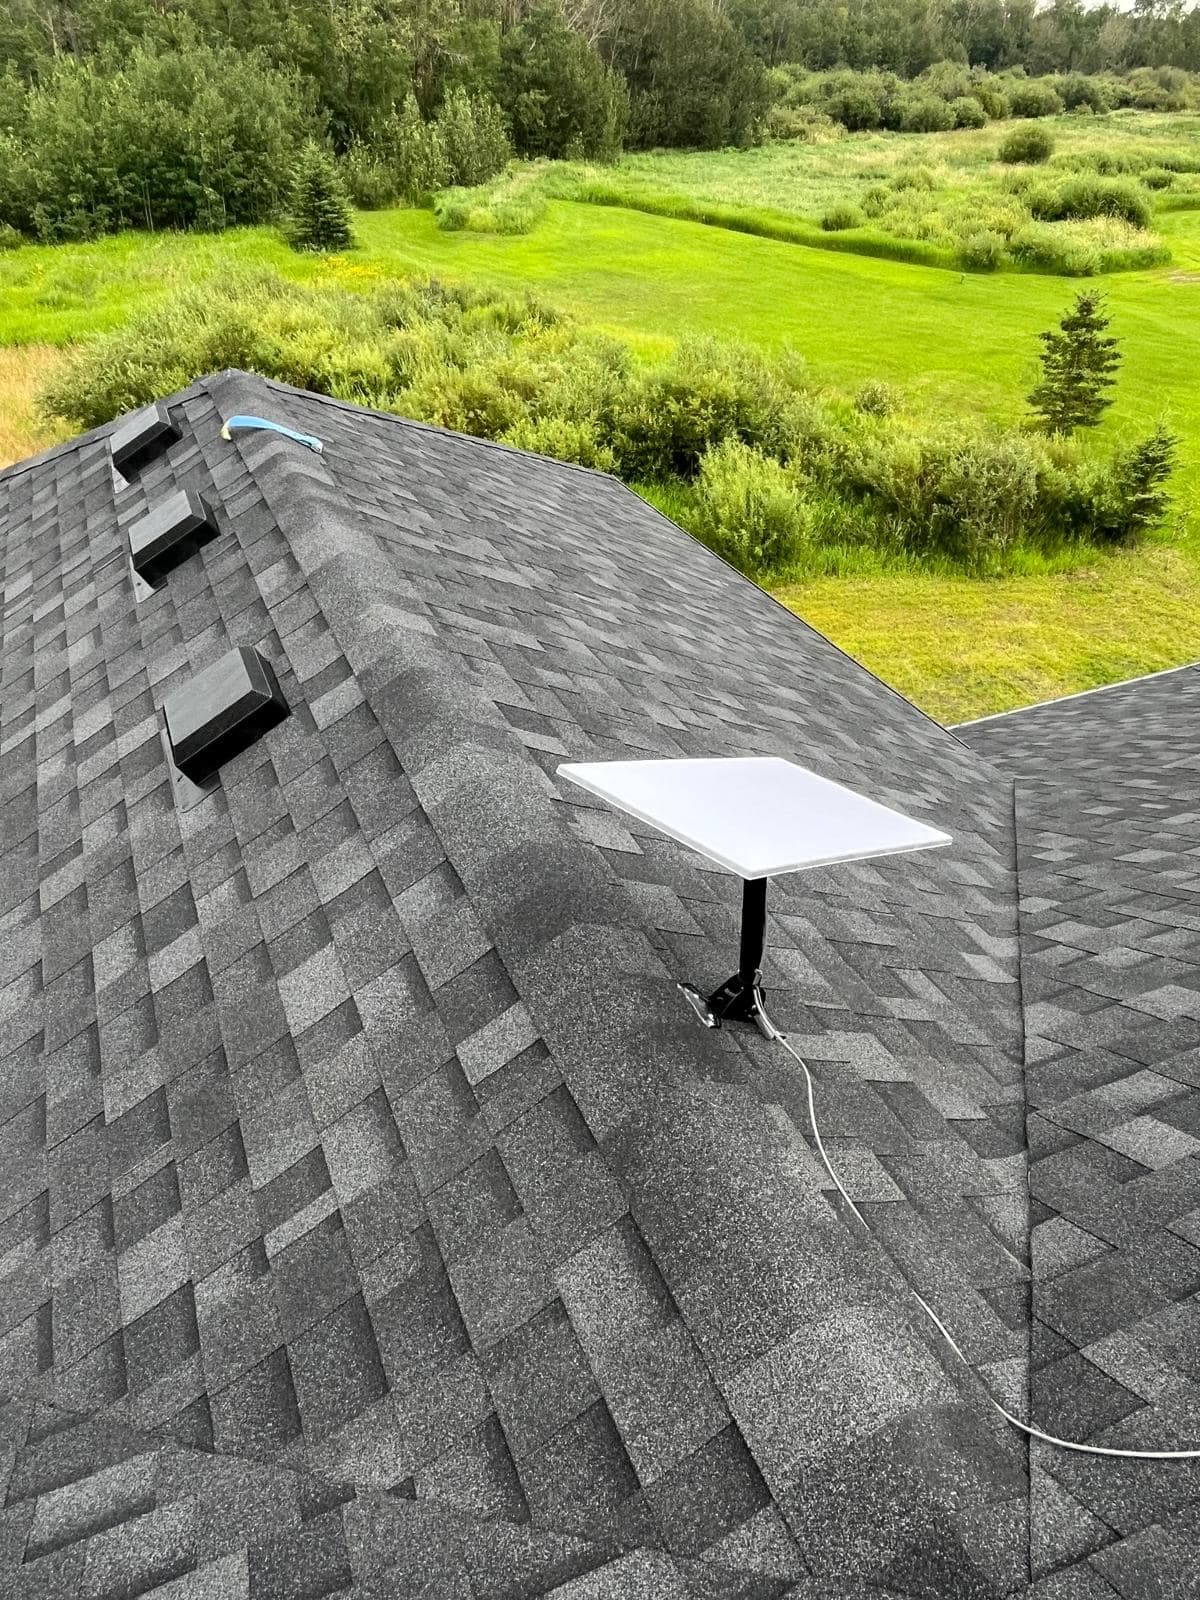
Residential installation on a rural property, with the cable run down the roof valley to a sealed entry point. 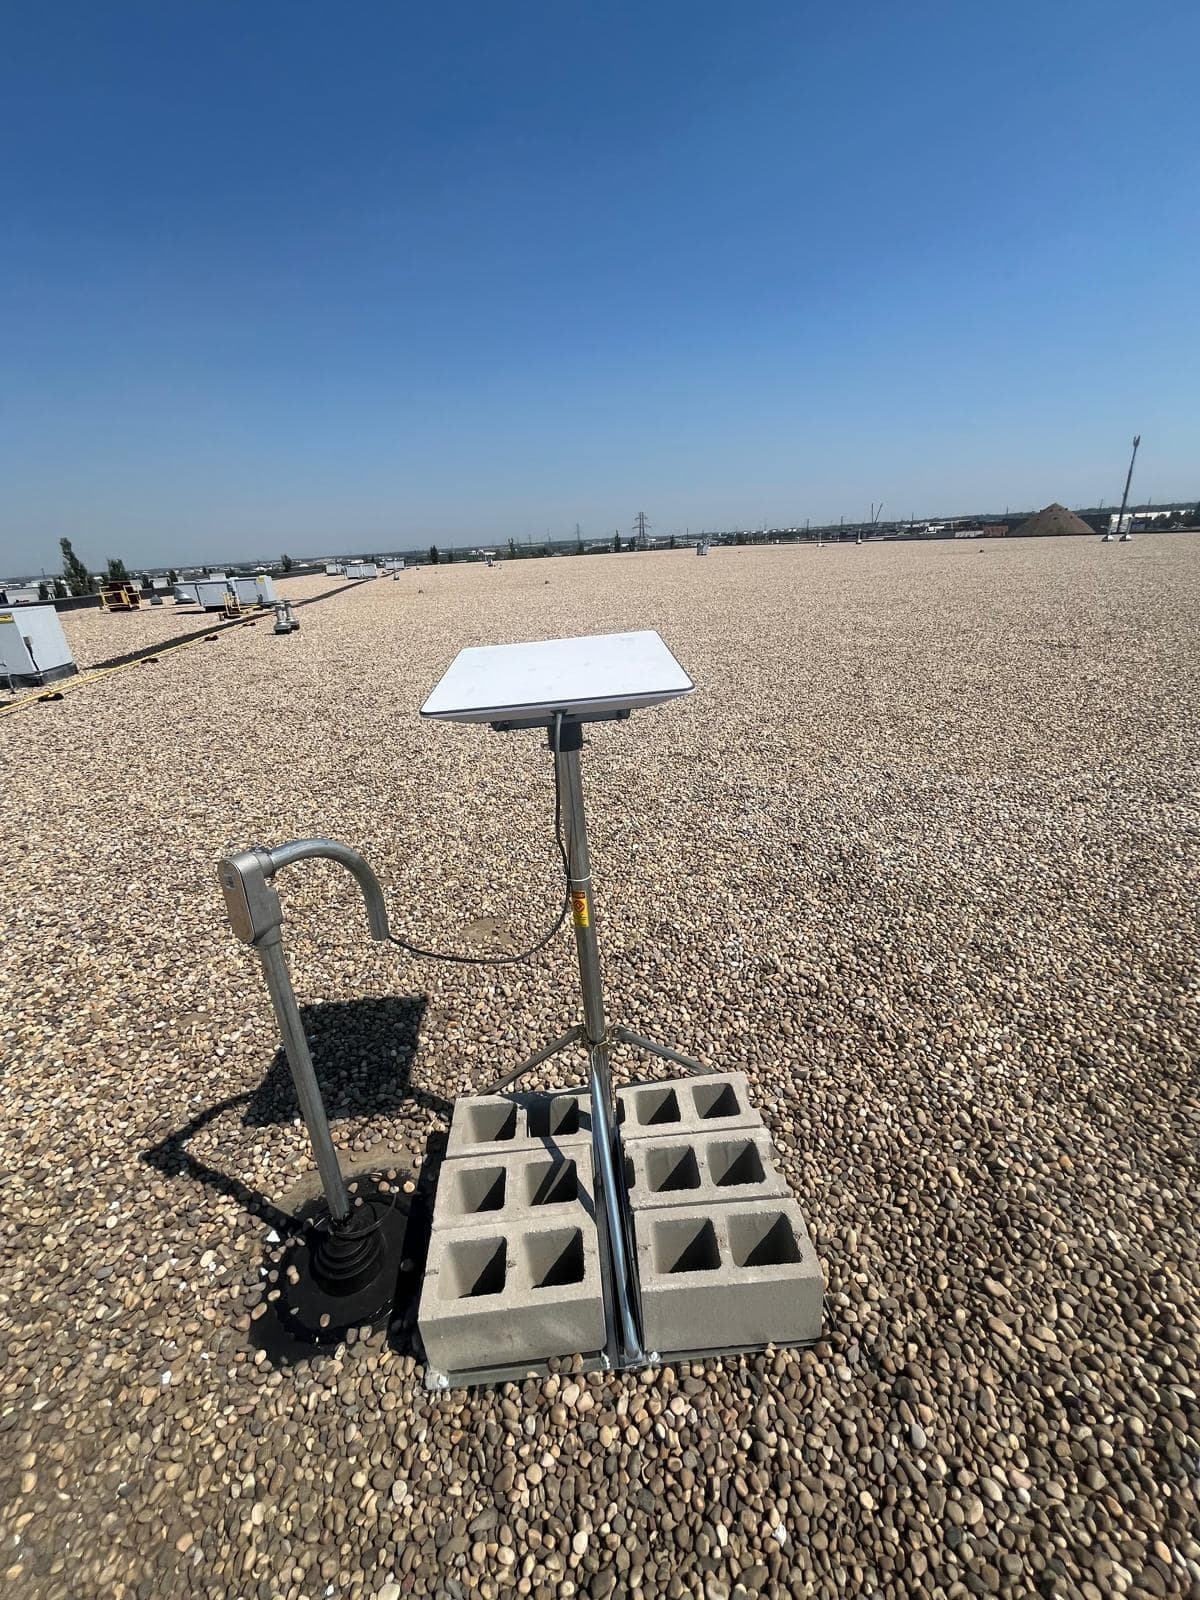
The cable drops into rigid conduit and through a properly flashed pipe boot — the detail that keeps water out of the building. 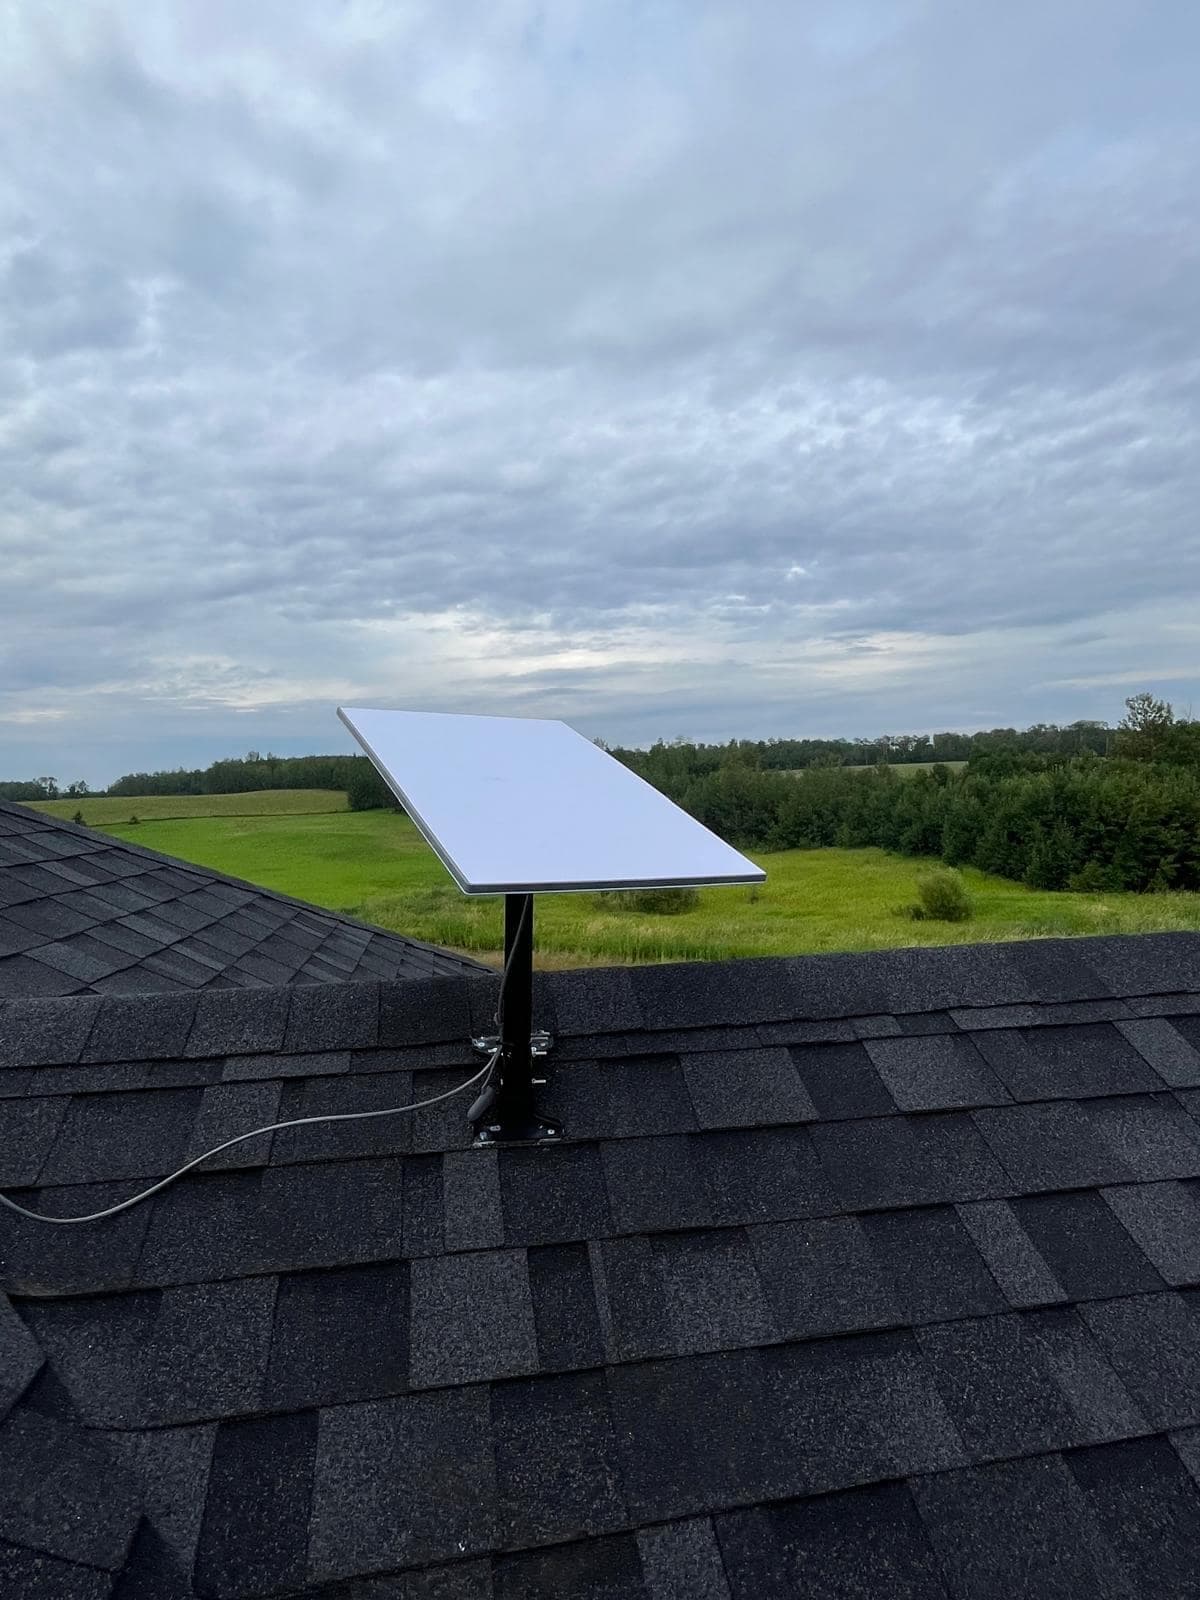
A steeper dish angle helps snow shed rather than settle — worth doing wherever the sightlines allow it. 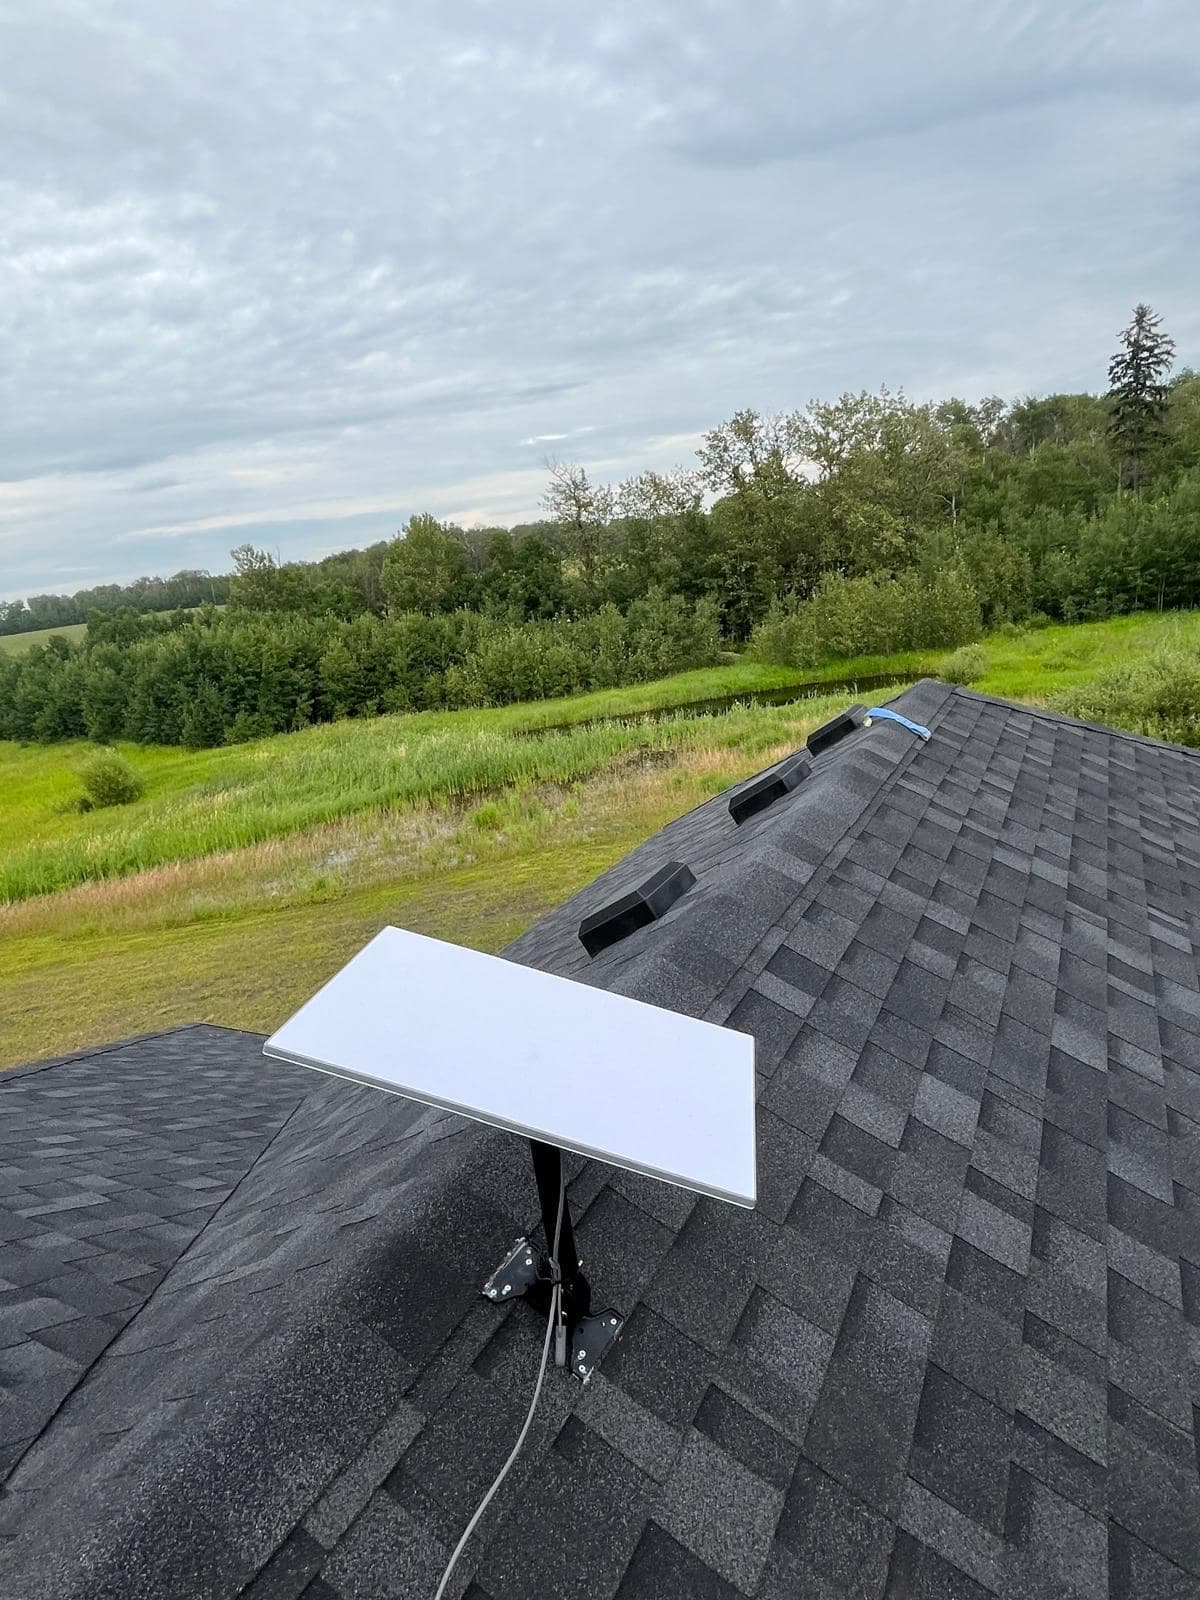
Ridge mount fixed through to structure, not sheathing. Positioned clear of the path snow takes when it sheds off the roof. 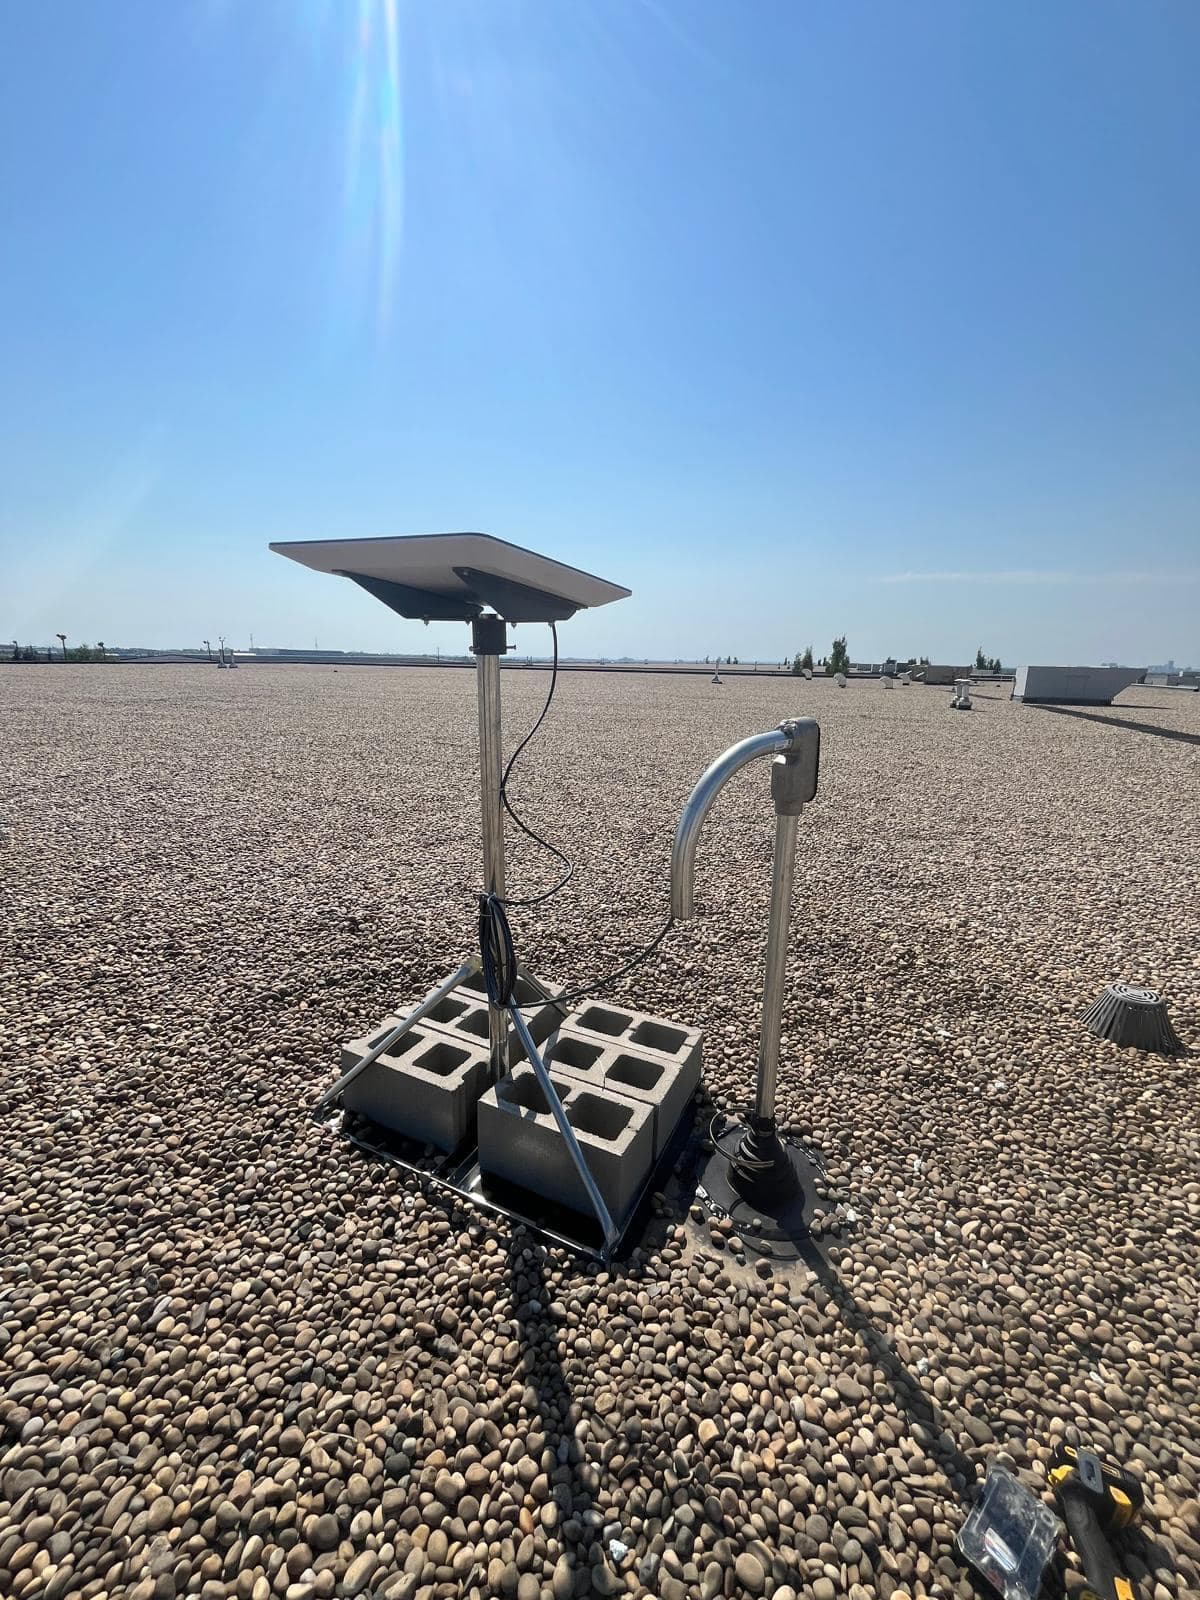
A weatherhead turns the conduit downward so water runs off rather than into the run. Ballast sized for the exposure this roof actually sees.
Who This Service Is For
The situations where this work is usually the right answer.
Rural and acreage properties
Homes beyond the reach of fibre or cable, where Starlink is the only realistic path to a usable connection and the mount has to survive open-field wind loading.
Businesses needing a working connection
Shops, offices and yards where the connection carries point-of-sale, cameras and cloud software, and an afternoon of downtime has a real cost.
Remote and temporary work sites
Construction trailers, camps and seasonal operations that need connectivity stood up quickly and taken down cleanly at the end of a project.
Existing Starlink owners with problems
Dishes already installed but dropping out, reading obstructions, sagging on a failing mount, or leaking at the cable entry.
What the Installation Includes
Everything below is part of a standard engagement, not a list of chargeable extras.
- On-site obstruction survey covering the full satellite arc, not just overhead
- Mount selection and placement recommendation before any hole is drilled
- Roof, wall, pole, non-penetrating ballast or ground mounting as the site requires
- Mounting into rafters or structural members rather than sheathing alone
- Weather-sealed cable entry with proper drip loop and exterior-rated sealant
- Cable routing through attic, wall cavity, soffit or conduit — concealed where practical
- Grounding and bonding where the mount and local code require it
- Router placement, Wi-Fi configuration and channel selection for the building
- Speed, latency and packet-loss verification before we leave the site
- Obstruction map reviewed with you in the Starlink app so you know what to expect
- Cleanup, and a walkthrough of the installation and how to read the app
Our Process
How a project runs from first contact to handover.
Site assessment
We walk the property, check sightlines against the satellite arc, identify candidate mounting positions, and confirm a viable cable path into the building.
Mount and route agreement
Before drilling anything we confirm the mount type, the exact dish position, where the cable will enter, and where the router will live.
Mounting and cable routing
The mount is fixed to structure, the dish aligned, and the cable run and sealed at the entry point with a drip loop to keep water out.
Network setup and verification
Router configured, Wi-Fi tuned to the building, then speed, latency, packet loss and the obstruction map checked and reviewed with you.
Equipment We Support
- Starlink Standard (rectangular dish)
- The common residential kit. Supports roof, wall, pole and ground mounts; we supply the mount that suits the site rather than defaulting to the included base.
- Starlink Gen 3 and Standard Actuated
- Current-generation residential hardware, including motorised units that self-orient once positioned with adequate clearance.
- Starlink Performance and Enterprise dishes
- Wider field of view and higher throughput hardware for business sites, mounted with the heavier-duty hardware those dishes require.
- Starlink Mini
- Compact hardware for portable and secondary-site use, including trailer and vehicle-adjacent mounting.
- Third-party mounts and enclosures
- Non-penetrating ballast mounts, extended pole mounts, ridge and eave mounts, and weatherproof enclosures for exposed router placements.
Where We Work
We install Starlink throughout the Edmonton metro area including Sherwood Park, St. Albert, Spruce Grove, Leduc and Fort Saskatchewan, and travel to acreages, farms and work sites across central and northern Alberta. Rural and remote sites are a routine part of this work, not an exception.
See every area we serve across Alberta- Edmonton
- Sherwood Park
- St. Albert
- Spruce Grove
- Leduc
- Fort Saskatchewan
- Calgary
- Red Deer
- Grande Prairie
- Fort McMurray
Frequently Asked Questions
Common questions about starlink installation in Edmonton and across Alberta.
The Complete Starlink Guide
Everything we know about installing Starlink in Alberta, split by what you actually need to work out.
Edmonton
Edmonton-specific Starlink installation: mature canopy obstruction surveys, snow-shed-aware mounting and sealed cable entry for our climate.
EdmontonCommercial & Business
Business-grade Starlink deployments integrated into a real network, with failover, documentation and support — not a residential dish on a commercial building.
Commercial & BusinessRural & Acreage
For acreages, farms and rural properties: wind-rated mounting, long cable runs, and coverage that reaches the shop and barn rather than stopping at the house.
Rural & AcreageMounting Options
Roof, pole, wall, ground and non-penetrating mounts compared honestly — including which ones we would not recommend and why.
Mounting OptionsCable Routing
Routing the cable properly: attic, basement and conduit routes, sealed entry points and drip loops that keep water out of your wall.
Cable RoutingStarlink Wi-Fi Setup
The dish gets you the connection; it does not get you coverage. Bypass mode, access point layouts and mesh done properly.
Starlink Wi-Fi SetupTroubleshooting & Repair
Diagnosing why a working Starlink stopped working — obstruction, cable, power or Wi-Fi. The three have completely different fixes.
Troubleshooting & RepairInstallation Cost
An honest breakdown of what drives installation price, what the Alberta market looks like, and where cheap quotes get expensive.
Installation Cost
Starlink Installation by City
City-specific installation guidance, written for the terrain, climate and industry of each area.
Starlink Installation in Sherwood Park
Sherwood Park and Strathcona County — from mature Park neighbourhoods to the acreage belt east and the industrial corridor north.
Sherwood ParkStarlink Installation in St. Albert
St. Albert and Sturgeon County — Sturgeon River valley terrain, mature inner neighbourhoods, and the acreage belt north.
St. AlbertStarlink Installation in Spruce Grove
Spruce Grove, Stony Plain and Parkland County — newer housing stock, the western acreage belt, and open-country exposure.
Spruce GroveStarlink Installation in Leduc
Leduc, Beaumont and the Nisku industrial park — flat open exposure, and more commercial work than any other community around Edmonton.
LeducStarlink Installation in Fort Saskatchewan
Fort Saskatchewan and the Industrial Heartland — river valley residential terrain, petrochemical plant-site work, and the acreage belt northeast toward Lamont County.
Fort SaskatchewanStarlink Installation in Red Deer
Red Deer, Lacombe, Ponoka and the agricultural counties midway between Edmonton and Calgary, mounted for open-prairie wind exposure.
Red DeerStarlink Installation in Calgary
Starlink installation for Calgary, the foothills and the acreage belt, with mounting specified for chinook wind loading.
CalgaryStarlink Installation in Grande Prairie
Starlink for farms, acreages and energy-sector sites across the Peace region, mounted for open exposure and severe winter conditions.
Grande PrairieStarlink Installation in Fort McMurray
Starlink for camps, industrial sites and homes across the Wood Buffalo region, specified for extreme cold and remote operation.
Fort McMurray
Related Services
Work that commonly goes with this, and that we handle at the same time.
Wi-Fi Installation
Surveyed access point layouts that fix dead zones properly — for houses, offices, warehouses, metal shops and outdoor yards.
Wi-Fi InstallationRemote Site Connectivity
Internet stood up where none exists — construction sites, camps, remote yards and unmanned installations, built to be deployed, moved and recovered.
Remote Site ConnectivityCellular Antenna Installation
Directional, omnidirectional and MIMO antenna installations that turn a marginal cellular signal into a usable connection — measured, not guessed.
Cellular Antenna InstallationCommercial Network Installation
Designed and installed business networks: switching, routing, VLAN segmentation, firewalls, PoE and internet failover built to survive a working day.
Commercial Network Installation
Request a Quote
Tell us about the site and what you need. We will come back to you with a straight answer about what the work involves and what it costs.